
Karri Pakora: Finger lickin' good, literally!
My grandmother's karri was not only loved because it was delicious but because it was shared with everyone around her.
Karri is loved in almost every household in Pakistan. But the cooking procedure can intimidate even the most well seasoned and skilled cooks. I learnt how to make it whilst watching my mother cook it in her kitchen.
But my love for karri goes back to my barri ammi’s (maternal grandmother) cooking skills and generosity. In her house, the rule was simple. Karri was never cooked in medium or moderate quantity. It was always cooked as if 30 people were coming over for dinner. Bari Ammi would send a bowl each to all her friends and relatives living close by. Hence, her karri was not just loved because it was delicious but because she would remember everyone around her while cooking it.
It is strange how such insignificant observations shape a young mind.
Till date I have never cooked it for myself alone. I have always made enough for it to be shared with my friends too. Therefore, cooking karri is more like a religious ritual to me than cooking a procedure-intensive dish.
This recipe was a challenge for me to compile as I am used to cooking karri in larger quantities only. It took a bit of an effort to scale it down even though it’s a very simple dish to make.
The cooking procedure is broken down into two parts.
The trick is to finish making the gravy first and add the pakoras later. But the cooking preparation should be done before hand so there isn’t a long gap between cooking the gravy and adding the pakoras to it because the curry gets thicker as it cools down. You need to ensure the pakoras are added before the gravy cools down and thickens.
So here we go:
For the gravy you will need the following ingredients:
Chickpea flour (Baisan) – 1 cup
Yogurt – 500 grams
Oil – ½ cup
Onion – 3 medium-sized (chopped)
Tomatoes – 3 to 4 medium sized
Ginger/Garlic paste – 1 tbsp
Cumin (zeera) – ½ tsp
Dried red chillies – 2 to 3
Green chillies – 1 to 2
Curry leaves – 4 to 6 fresh ones or 3 to 4 dry ones
Salt – 1 tsp (adjust it according to taste)
Chilli powder – 1 tbsp
Turmeric – ½ tsp
Water – 3 cups
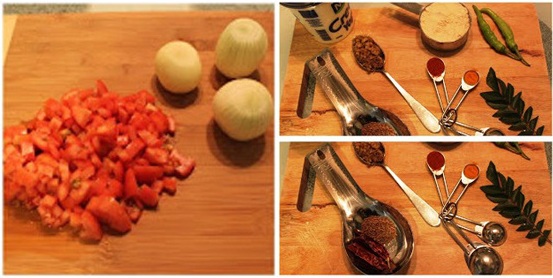 Photo: Ambreen Malik
Method:
1) In a blender/liquidiser, pour 500 grams of yogurt, two cups of water and one cup of chickpea flour. Blend it. This is the mixture for the gravy.
 Photo: Ambreen Malik
2) In a blender, add the tomatoes and green chillies, blend to make a purée.
 Photo: Ambreen Malik
3) Heat some oil in a cooking pot. Now add the chopped onions and let them brown.
4) As the onions turn brown, add the ginger/garlic paste, cumin and dried red chillies.
 Photo: Ambreen Malik
5) As soon as the ginger/garlic paste turns golden, add the tomato purée, salt, red chilli powder and turmeric.
6) Now cook this mixture till the tomatoes are well done and the oil separates on the sides.
 Photo: Ambreen Malik
7) Add the blended yogurt and chickpea mixture into the cooking pot.
8) Pay attention to the smell. It will smell like raw chickpea flour for around 10 minutes. Keep stirring continuously as the flour can burn from the bottom. The gravy needs to boil for at least 30 minutes on medium flame before the raw smell disappears.
 Photo: Ambreen Malik
9) Add the remaining one cup of water (or more if it’s too dry) to the mixture as it boils. You will notice that the gravy’s consistency will start to change similar to a hot custard. It should cover the back of the spoon with a thin film.
 Photo: Ambreen Malik
10) Now leave the gravy on low flame on your stove and cover it with a lid. It should stay hot but not boil as the water will vaporise.
It’s time to make the pakoras.
Ingredients:
Chickpea flour (Baisan) – 1 cup
Baking powder – 1 tsp
Cumin seed (zeera) – 1 tsp (crushed in a pastel mortar)
Dried coriander seeds – 1 tbp (crushed in a pastel mortar)
Onion – 1 small-sized (chopped)
Salt – 1 tsp
Crushed red chillies – ½ tsp (adjust if you want pakoras to be spicy)
Fresh coriander – handful (chopped)
Fresh mint – handful (chopped)
Green chillies – 1 tsp (finely chopped)
Water – half cup
Oil for deep frying the pakoras.
 Photo: Ambreen Malik
Method:
We have all made pakoras a million times in our kitchen. This is no different. The tricky part of the karri is already done.
1) Put a wok/frying pan on the stove with plenty of oil for deep frying. The oil must be hot before the batter hits it.
2) In a bowl, add the chickpea flour, baking powder, salt, crushed red chillies, cumin seeds and crushed coriander seeds.
 Photo: Ambreen Malik
3) Slowly add water and whisk the batter. The consistency should be thick. Be careful with the water. Make sure you add less water because when you add the onion later, the water from the fresh onions will add on to the batter.
4) Once it is mixed, add onions, green chillies, coriander and mint. Mix thoroughly.
 Photo: Ambreen Malik
5) Make the pakoras as soon as the batter is mixed. Keep the oil really hot. If the batter is left to sit, it will thin out and the pakoras will turn out flat and hard.
6) Spoon the mixture in hot oil one by one and make them golden brown on both sides.
7) Remove from the oil and drain them on a kitchen paper. Put them in the hot gravy immediately. Mix and cover the pot.
 Photo: Ambreen Malik
8) Fry the next batch of pakoras and add them to the gravy the same way.
9) Leave the pakoras in the gravy for 15-20 minutes before dishing the karri out. The pakoras will absorb the liquid from the gravy and will become softer.
 Photo: Ambreen Malik
10) Pour the dish in a large bowl and add a tarka with onions, cumin seeds and oil. Add fresh green chillies, mint and coriander for garnishing.
 Photo: Ambreen Malik
I usually find myself making a second round of batter for pakoras as the company around me usually gulps down half of the first batch before they can be added into the gravy. So make another batch of fresh batter and fry some more pakoras.
I love eating karri with boiled basmati or regular rice as it becomes a wholesome meal. But if you prefer to have it with roti, that’ll be great as well.
I must confess though, for me, the fun of eating karri is to roll my sleeves up, put a big helping of karri on a substantial heap of rice and digging in my fingers. The idea of finger lickin’ good is actually true! Give it a try!
Enjoy this simple recipe for some delicious yet simple karri!
This recipe originally appeared here.

More by this writer


COMMENTS (21)
Comments are moderated and generally will be posted if they are on-topic and not abusive.
For more information, please see our Comments FAQ